I decided to play a bit with my old Arduino again. It’s a pretty dated model (Duemilanove). Based on the ATmega328P microcontroller it’s clocked at 16MHz, has 30kB of usable flash and 2kB of SRAM.
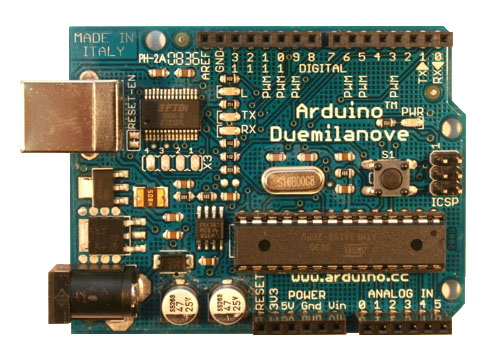
Arduino Duemilanove
That’s not much to go with but I always wanted to make something that would transform the board into some kind of security device for the PC: an authentication token, encryption device, whatever. Of course the ATmega328P doesn’t have any “secure memory” so it can’t be anything serious, but I like to learn new things. In the past I’ve made some circuits with sensors, LCDs, the usual basic stuff. I’ve never really tried a two-way communication with PC though.
First things first, I needed a development environment. I never really liked the Arduino IDE, it’s too simplistic and tries to hide every hardware complexity from you. I guess that’s the point of Arduino but I wanted something better. In the past I’ve used Atmel’s AVR Studio (which apparently is just Atmel Studio nowadays, I should take a look at what’s changed). After some searching I found Visual Micro, a plugin for Visual Studio. It’s free (I think the USB debugging functionality requires a paid license) and works with the free Visual Studio Community edition. Perfect.
You need the standard Arduino IDE for the toolchain and libraries so install that before Visual Micro. The Visual Micro extension works fine although it’s apparently written by people that don’t know what multithreading is — every longer operation (like flashing the chip) freezes the whole VS IDE. It’s just a minor annoyance though. After installation you need to configure the Arduino software path and select your board from the configuration menu. After that you’re pretty much good to go.
I decided to write something simple to start — a program that would perform symmetric encryption on the data sent from the PC. The key would only be stored on the Arduino, in the future maybe initialized from user input during “device pairing”.
2kB of memory doesn’t leave much space for anything fancy. After some research I found this implementation of AES128 that’s specifically targeted at small microcontrollers and optimized for size. Of course the input data needed to be processed in chunks because of memory constraints.
| Arduino code |
SelectShow |
#include "aes.h"

// internal LED pin number
#define LED_PIN 13

#define LED_ON    digitalWrite(LED_PIN, HIGH)
#define LED_OFF   digitalWrite(LED_PIN, LOW)

void ERROR(void)
{
    // just blink forever
    while (1)
    {
        LED_ON;
        delay(100);
        LED_OFF;
        delay(100);
    }
}

// blink num times with a longer pause at the end
void blink(uint8_t num)
{
    while (num != 0)
    {
        LED_ON;
        delay(200);
        LED_OFF;
        delay(200);
        num--;
    }
    delay(500);
}

// show byte's nibbles by blinking
void show_byte(uint8_t b)
{
    uint8_t hi = b >> 4;
    uint8_t lo = b & 0x0f;

    blink(hi);
    blink(lo);
    delay(500);
}

// if you *really* want you can show 32bit values
void show_dword(uint32_t u)
{
    show_byte((u & 0xff000000) >> 24);
    show_byte((u & 0x00ff0000) >> 16);
    show_byte((u & 0x0000ff00) >> 8);
    show_byte((u & 0x000000ff));
    delay(1000);
}

// biggest 16*n buffer that would fit
#define BUF_LEN 400

// key and initialization vector for cbc mode
const uint8_t key[] = { 0x2b, 0x7e, 0x15, 0x16, 0x28, 0xae, 0xd2, 0xa6, 0xab, 0xf7, 0x15, 0x88, 0x09, 0xcf, 0x4f, 0x3c };
const uint8_t iv[] = { 0x00, 0x01, 0x02, 0x03, 0x04, 0x05, 0x06, 0x07, 0x08, 0x09, 0x0a, 0x0b, 0x0c, 0x0d, 0x0e, 0x0f };

void setup()
{
    pinMode(LED_PIN, OUTPUT);

    // above 250k the connection becomes unreliable or just doesn't work
    Serial.begin(250000);
}

void loop()
{
    uint32_t offset;
    uint32_t size;
    size_t tx;
    uint8_t in[BUF_LEN], out[BUF_LEN];
    uint8_t encrypt;

    // initial show that we're live
    show_byte(0x42);

    // wait for serial data
    LED_ON;
    while (Serial.available() == 0)
        ;
    LED_OFF;

    // read total size
    tx = Serial.readBytes((uint8_t*)&size, sizeof(size));
    if (tx != sizeof(size))
        ERROR();

    // reply with the same value, if it doesn't match on the PC side we have a connection problem
    Serial.write((uint8_t*)&size, sizeof(size));

    // read operation mode: 1 = encrypt, 0 = decrypt
    tx = Serial.readBytes(&encrypt, 1);
    if (tx != 1 || (encrypt != 0 && encrypt != 1))
        ERROR();

    // main loop
    offset = 0;
    while (offset < size)
    {
        // read a single chunk
        tx = Serial.readBytes(in, BUF_LEN);
        if (tx != BUF_LEN)
            ERROR();

        // trivia: is this the correct way to use AES-CBC?
        if (encrypt)
            AES128_CBC_encrypt_buffer(out, in, BUF_LEN, key, iv);
        else
            AES128_CBC_decrypt_buffer(out, in, BUF_LEN, key, iv);

        // write the result
        tx = Serial.write(out, BUF_LEN);
        if (tx != BUF_LEN)
            ERROR();

        offset += BUF_LEN;
    }

    // after we're finished this function is executed again
}
|
The communication goes through a virtual serial port over a USB cable. When you connect the board to the PC Windows should install necessary drivers from Windows Update (serial is emulated by a standard FTDI UART chip on the Arduino). Since the serial port is used for data communication I couldn’t really use it for error reporting so I’m just blinking the internal LED if something goes wrong. I could hook up a LCD or something but I’m lazy. 🙂
The PC-side code is equally simple to write: open the appropriate COM port, read some file, send data, read data, write output file, done. But… it didn’t work. I couldn’t get the communication going properly. My Windows program sends the total data size first and the Arduino echoes it to acknowledge. Problem was, I was receiving seemingly random values from the Arduino every time. I tried to tinker with the COM port settings in Windows, to no avail. With some settings the board apparently got reset because I was observing my “42” LED blinking pattern. That got me thinking — because the serial connection is also used for programming the board, maybe it interpreted my data incorrectly. This page explains how to disable said auto-reset by hardware modifications but surely it should be possible without that? And it is. Apparently when my program opens the COM port the connection parameters have some weird default values not inherited from the device settings in the control panel. After setting those setting everything started to work fine. So, here’s the Windows code.
| Windows code |
SelectShow |
#include <stdio.h>
#include <windows.h>

#define BUF_LEN 400

int wmain(int argc, WCHAR* argv[])
{
    HANDLE serial, input, output;
    BYTE buf[BUF_LEN];
    DWORD tx, size, offset, count;
    LARGE_INTEGER fsize = { 0 };
    DCB dcb = { 0 };
    BYTE encrypt;
    DWORD tick1, tick2;

    if (argc < 4)
    {
        wprintf(L"usage: %s e|d input_file output_file\n", argv[0]);
        return 0;
    }

    // open Arduino's virtual serial port
    serial = CreateFile(L"\\\\.\\com3",
                        GENERIC_READ|GENERIC_WRITE,
                        0,
                        NULL,
                        OPEN_EXISTING,
                        FILE_ATTRIBUTE_NORMAL,
                        NULL);

    if (serial == INVALID_HANDLE_VALUE)
    {
        wprintf(L"failed to open com\n");
        return 1;
    }

    // set connection parameters
    dcb.DCBlength = sizeof(dcb);
    GetCommState(serial, &dcb);
    dcb.BaudRate = 250000; // match with Arduino's
    dcb.ByteSize = 8;
    dcb.StopBits = ONESTOPBIT;
    dcb.Parity = NOPARITY;
    dcb.fDtrControl = DTR_CONTROL_DISABLE; // prevent Arduino's reset
    dcb.fRtsControl = RTS_CONTROL_DISABLE;
    dcb.fDsrSensitivity = FALSE;
    dcb.fInX = FALSE;
    dcb.fOutX = FALSE;
    dcb.fNull = FALSE;
    dcb.fAbortOnError = FALSE;
    SetCommState(serial, &dcb);

    // operation mode
    if (argv[1][0] == L'e')
        encrypt = 1;
    else
        encrypt = 0;

    input = CreateFile(argv[2],
                       GENERIC_READ,
                       FILE_SHARE_READ,
                       NULL,
                       OPEN_EXISTING,
                       FILE_ATTRIBUTE_NORMAL,
                       NULL);

    if (input == INVALID_HANDLE_VALUE)
    {
        wprintf(L"failed to open input\n");
        return 1;
    }

    output = CreateFile(argv[3],
                        GENERIC_WRITE,
                        FILE_SHARE_READ,
                        NULL,
                        CREATE_ALWAYS,
                        FILE_ATTRIBUTE_NORMAL,
                        NULL);

    if (output == INVALID_HANDLE_VALUE)
    {
        wprintf(L"failed to open output\n");
        return 1;
    }

    GetFileSizeEx(input, &fsize);
    if (encrypt)
    {
        if (fsize.HighPart != 0)
        {
            wprintf(L"file too big\n");
            return 1;
        }
        WriteFile(output, &fsize.LowPart, 4, &tx, NULL);
    }
    else
    {
        // the original file size is stored at the beginning of the encrypted one
        ReadFile(input, &size, 4, &tx, NULL);
        fsize.LowPart -= 4;
    }

    // send data size
    wprintf(L"data size: %lu\n", fsize.LowPart);
    WriteFile(serial, &fsize.LowPart, 4, &tx, NULL);
    // read ack
    ReadFile(serial, &fsize.HighPart, 4, &tx, NULL);
    wprintf(L"got size:  %lu\n", fsize.HighPart);
    if (fsize.HighPart != fsize.LowPart)
    {
        wprintf(L"bad ack\n");
        return 1;
    }

    // send mode of operation
    WriteFile(serial, &encrypt, 1, &tx, NULL);
    count = offset = 0;
    tick1 = GetTickCount();
    while (offset < fsize.LowPart)
    {
        ZeroMemory(buf, BUF_LEN);
        ReadFile(input, buf, BUF_LEN, &tx, NULL);
        if (tx != BUF_LEN) // nonfatal if the input file needs padding
            wprintf(L"input read failed: %lu\n", tx);

        WriteFile(serial, buf, BUF_LEN, &tx, NULL);
        if (tx != BUF_LEN)
        {
            wprintf(L"serial write failed: %lu\n", tx);
            return 1;
        }

        ReadFile(serial, buf, BUF_LEN, &tx, NULL);
        if (tx != BUF_LEN)
        {
            wprintf(L"serial read failed: %lu\n", tx);
            return 1;
        }

        WriteFile(output, buf, BUF_LEN, &tx, NULL);
        if (tx != BUF_LEN)
            wprintf(L"output write failed\n");

        count += BUF_LEN;
        if (count >= 10240) // progress report every 10kB
        {
            wprintf(L"%.2f%%\n", 100.0 * offset / fsize.LowPart);
            count = 0;
        }

        offset += BUF_LEN;
    }
    tick2 = GetTickCount();
    wprintf(L"Processed %lu kB, %.2f kB/s", fsize.LowPart / 1024, (fsize.LowPart/1024.0) / ((tick2 - tick1) / 1000.0));

    // if decrypting, truncate the output to remove eventual padding
    if (!encrypt)
    {
        fsize.QuadPart = size;
        SetFilePointerEx(output, fsize, NULL, FILE_BEGIN);
        SetEndOfFile(output);
    }
    return 0;
}
|
So, how about performance? The maximum serial speed I managed to get is 250000 baud. If I went over that the connection started to get unreliable or just broke. Buffer size had a big impact and the maximum value I could squeeze was 400 bytes (must be a multiple of 16, the AES128 block size). With these settings I was getting 5.66 kB/s encryption speed and 4.82 kB/s decryption (the difference is typical for AES). It seems I won’t be using this to encrypt my disk or any big files. 🙂 Still, not bad for a tiny 8-bit chip and the code is optimized for size, not speed.
All in all I’m happy with the results. Next project: create a Windows Credential Provider using Arduino? 😉 Or just more experiments with a more powerful chip (Due, a Cortex M3 ARM perhaps?).
~ by omeg on May 10, 2015.
C/C++,
code,
hardware

Leave a Reply